
Starting potato plants may seem daunting at first, but with a little knowledge and care, you can grow a bountiful harvest.
In this blog post, we’ll guide you through the steps of starting your potato plants.
Understanding Potatoes
Before diving into planting, it’s essential to understand what potatoes need to thrive. Potatoes are tubers that grow under the soil’s surface.
They prefer cool weather and well-drained, loose soil. They are relatively hardy but need the right conditions to produce well.
Step 1: Choosing Seed Potatoes
First, you need to select your seed potatoes. These are not the same as the potatoes you buy from a grocery store. Seed potatoes are certified disease-free and are sold specifically for planting.
Choose varieties that suit your climate and taste preferences. Popular varieties include Russet, Yukon Gold, and Red Pontiac.
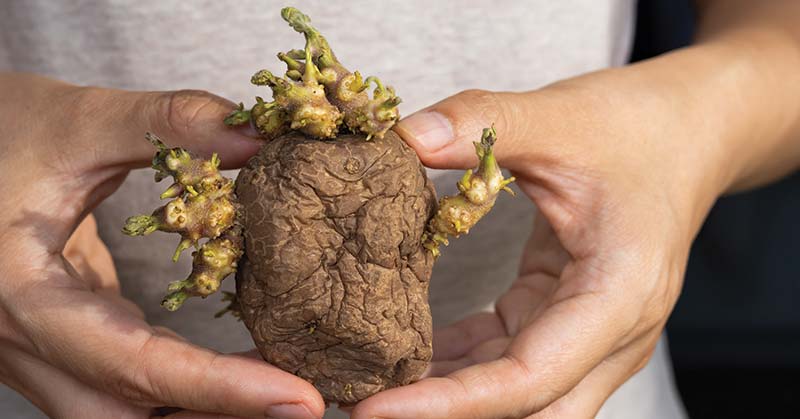
Step 2: Chitting Your Potatoes
Chitting is the process of pre-sprouting potatoes before planting them. This step is optional but can lead to a quicker and more robust start. To chit potatoes, place them in a bright, cool area (around 60-70°F) with plenty of indirect sunlight.
Position them so that the end with the most eyes (small indentations from where the plant will grow) is facing up. In a few weeks, you’ll see sprouts forming.
Step 3: Preparing the Soil
Potatoes thrive in loose, well-drained soil with a slightly acidic pH (around 5.0 to 5.5). Prepare your garden bed by loosening the soil and adding organic matter like compost to help with drainage and nutrients.
Avoid adding fresh manure or lime, which can promote potato scab.
Step 4: Planting
Once your seed potatoes have sprouted and the soil has warmed up to at least 45°F, you can plant them. Cut larger seed potatoes into chunks, ensuring each piece has at least one or two sprouts.
Plant these chunks about 3 inches deep and 12 inches apart in rows. The rows should be spaced about 2 to 3 feet apart.
Step 5: Caring for Your Potato Plants
After planting, your primary tasks will be watering and hilling. Potatoes need a consistent amount of water, so keep the soil moist but not waterlogged. As the plants grow, pile soil around the base of the plant, covering the stem but leaving the top leaves exposed.
This process, known as hilling, helps protect the growing tubers from sunlight, which can turn them green and toxic.
Step 6: Dealing with Pests and Diseases
Be vigilant about pests and diseases. Common problems include potato beetles and blight. You can handpick beetles and use organic or traditional pesticides if necessary.
Rotate your potato crops each year to prevent disease buildup in the soil.
Step 7: Harvesting
Potatoes are usually ready to harvest when the foliage begins to die back. For new potatoes, you can gently dig around the plants a few weeks after flowering.
For mature potatoes, wait until the plant has completely died back. Gently dig around the plant to unearth the potatoes, being careful not to bruise them.
Conclusion
Starting potato plants is a rewarding endeavor that brings you closer to the food you eat. With proper care and attention, you can enjoy a plentiful harvest of this versatile and beloved vegetable.
Remember, gardening is a learning process, so don’t be discouraged by mistakes. Instead, view them as opportunities to grow and improve.
FAQs on How do you Start Potato Plants
Q: What are the best types of potatoes to plant?
A: The best types of potatoes depend on your preference and climate. Popular choices include Russet for baking, Yukon Gold for versatility, and Red Pontiac for boiling. Look for varieties that are known to grow well in your region.
Q: Do I need to buy special potatoes for planting?
A: Yes, it’s recommended to use seed potatoes, which are certified disease-free and specifically meant for gardening. Regular potatoes from the grocery store might be treated to inhibit sprouting and could carry diseases.
Q: What is chitting, and is it necessary?
A: Chitting is pre-sprouting potatoes before planting. It’s not strictly necessary but can give your plants a head start. To chit potatoes, place them in a cool, bright area until sprouts start to form.
Q: How do I prepare the soil for planting potatoes?
A: Potatoes prefer loose, well-drained soil with a slightly acidic pH. Prepare your garden bed by loosening the soil and incorporating organic matter like compost. Avoid fresh manure and lime to prevent potato scab.
Q: How deep and far apart should I plant potatoes?
A: Plant seed potatoes about 3 inches deep and 12 inches apart in rows. The rows should be spaced about 2 to 3 feet apart to give the plants enough room to grow.
Q: What is hilling, and why is it important for potato plants?
A: Hilling involves piling soil around the base of the potato plants as they grow. This protects the developing tubers from sunlight, which can turn them green and make them toxic. Hill the plants when they’re about 6 inches tall and continue as they grow.
Q: How often should I water potato plants?
A: Potatoes need consistent moisture, so water them regularly to keep the soil moist but not waterlogged. Over-watering can lead to rot, while under-watering can affect tuber development.
Q: When is the best time to harvest potatoes?
A: For new (small) potatoes, harvest a few weeks after the plants flower. For mature potatoes, wait until the foliage dies back completely. Gently dig around the plant to harvest, being careful not to bruise the potatoes.
Q: Can I plant a potato that has sprouted in my kitchen?
A: While you can plant a sprouted kitchen potato, it’s not recommended. These potatoes may not be disease-free and could affect your entire crop. It’s safer to use certified seed potatoes.
Q: How do I protect my potato plants from pests and diseases?
A: Regularly inspect for pests like potato beetles and treat as necessary. Practice crop rotation and good garden hygiene to prevent disease. If you encounter persistent problems, consider using disease-resistant varieties.


